0

What is jQuery?

jQuery is a concise JavaScript library. In simple terms, its a very lengthy script file with many predefined functions that developers can leverage to develop rich client applications. You might find lot more resources to kick-start at http://www.jquery.com .

So why learn jQuery? why is it gaining popularity?
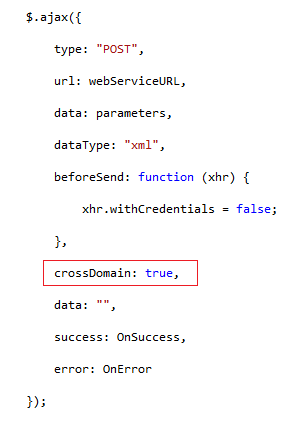
Users expect your site to be blazing fast, easy to navigate with minimum page refreshes (AJAX), minimum round trips to the server etc. so to accomplish most of this everything has to happen at the browser level or the requests should be asynchronous. That is exactly where jQuery come into picutre. You name it; think of it; it does it for you.  Good part is, you can extend jQuery, write your own functions and reuse the code.

Difference between jQuery and JavaScript
Let us understand this vivid difference with an example. We have a scenario where alternate rows of a table should be colored.

Using plain javascript:
var table = document.getElementById(id);
var rows = table.getElementsByTagName(“tr”);
for (i = 0; i < rows.length; i++)
{
       //manipulate rows
        if (i % 2 == 0) {
                                rows[i].className =“even”;
               }else {
                                 rows[i].className =“odd”;
               }
}

Using jQuery:
$(“table tr:nth-child(“even”)).addClass(“alternateColor”);

So you see the difference? All the above functionality  is achieved in one line. How?
jQuery has built-in functions that take the parameters and does it for you. You might wonder how it predicts what a developer would need? The authors of  jQuery have invested time and effort to create  ‘Utility Functions’ which are common and widely used. For instance charts, math functions, showing and hiding elements, event handling, styling, dynamic insertion of DOM elements etc. which the developers can utilize to develop applications.

Where can I get the jQuery Library?
You can download it free from http://www.jQuery.com

Will jQuery work in a JavaScript disabled browser?
NO! jQuery makes things easier for you and at the end of the days its still a JavaScript library and it WILL NOT work in a JavaScript disabled browser

Does jQuery slow down the rendering of webpages?
Not very much, a few milliseconds that we can afford for plethora of things it does for you. And most of the functions, as a best practise are not kicked in at ‘onLoad()’ of the page. They dive into action usually after all the DOM is completely rendered on the page.

More on JQuery… Please keep reading posts on JQuery on my blog…..

6

JQuery Ajax ‘Post’ not working in Chrome and Firefox

When I was using jQuery Ajax( ) to request an asmx web service with some input parameters it worked fine on IE (Internet Explorer), but not on Chrome and Firefox. I have done quite a bit of research and found few work arounds for this. This post assumes that  you are working on a SharePoint environment ( or .net) and making these webservice calls across domains.

Reason for failure: Cross-Origin Resource Sharing (CORS).

To explain in simple terms, if a request is being posted to a domain different than that of the client it fails in Chrome or Firefox; except for IE. As IE approves such communication by default. But most other browsers don’t. CORS enables AJAX requests to be posted to a domain different than that of the client.This type of requests are treated to as a security threat and has been denied by most of the browsers. And such a handshake should be done at server level.

The following post drives you through possible solutions and changes to the script respectively.

Original JQuery script

Original JavaScript Code

Original JavaScript Code

All below solutions are valid, they seemed to have worked for many readers and are marked as answers on various blogs. I am summarizing all these here even if they did not work for me, as they might work for you!

1. Add jQuery.support.cors = true;

Add Jquery.Support.Cors= true

Add Jquery.Support.Cors= true

Initially even IE did not respond for the Ajax requests. When the above line is added IE started responding.

‘cors’ is equal to true if a browser can create an XMLHttpRequest object and if that XMLHttpRequest object has a withCredentials property.To enable cross-domain requests in environments that do not support cors yet but do allow cross-domain XHR requests.

2. Add empty ‘data’ parameter to the ajax call

I cannot use this solution, as I have input parameters and data cannot be empty as show above

Empty Data Element

Empty Data Element

3. Add ‘beforeSend’ parameter to the Ajax call

Add BeforeSend Parameter

Add BeforeSend Parameter

4. Add crossDomain:true to the Ajax method

Add Cross Domain True

Add Cross Domain True

5. Add xhrFields to the Ajaxmethod

Add XHR Fields

Add XHR Fields

The ‘xhrFields’ property sets additional fields on the XMLHttpRequest. This can be used to set the ‘withCredentials’ property.Set the value to ‘true’ if you’d like to pass cookies to the server. If this is enabled, your server must respond with the header Access-Control-Allow-Credentials: true’.

6.Change Button type to Submit

Not working in Chrome and Firefox

Input Type='button'

Input Type=’button’

Working in Chrome and Firefox

Input Type='submit'

Input Type=’submit’

Sorry if the above solutions disappointed you. Let me provide the solution that worked for me. Please understand that this solution is valid only for ASP.NET WebService application only. Modify the following sections on web.config file of the web service to

Web.Config Changes

Web.Config Changes

NOTE: Use Access-Control-Allow-Origin value* in header only on chosen URLs that need to be accessed cross-domain. Don’t use the header for the whole domain.

References or Useful resources:

1. http://encosia.com/using-cors-to-access-asp-net-services-across-domains/

2. http://www.html5rocks.com/en/tutorials/cors/

3. http://www.bennadel.com/blog/2327-Cross-Origin-Resource-Sharing-CORS-AJAX-Requests-Between-jQuery-And-Node-js.htm

4. https://www.owasp.org/index.php/HTML5_Security_Cheat_Sheet

0

Calling a Web Service (asmx) via Jquery

This post guides on how you can call an asmx webservice via JQuery. For those who are not familiar with JQuery, its a consise javascript library. To make it simple its a lenghty java script file which contains predefined functions, which users can leverage to develop rich client side applications. You may download the latest from www.jquery.com

<!DOCTYPE HTMLPUBLIC“-//W3C//DTD HTML 4.0 Transitional//EN”>

<html>

<head>

<!–Step1: Add reference to the jquery script file.–>

<scriptsrc=”JS/jquery-1.8.3.min.js”type=”text/javascript”></script>

<!–Step 2: Show acitivity indicator. This would help the users know  that some activity is going on in the background.–>

<scripttype=”text/javascript”language=”javascript”>

   $(document).ready(

function () {

              $(“#activityIndicator”).bind(“ajaxSend”, function () {

$(this).show();}).bind(“ajaxStop”, function () {

                   $(this).hide();}).bind(“ajaxError”, function () {

      $(this).hide();

            });

});

</script>

<!–Step 3:  Make a webservice call. Most of the below script is self explanatory .–>

<scripttype=”text/javascript”language=”javascript”>

//URL path to the webservice

var webServiceURL = ‘http://ServerName/WebService.asmx/WebMethod’;

function CallWebSerivce() {

//Get the parameter to the service from the user input

var parma1value = document.getElementById(‘<%= Ctrl1.ClientID %>’).value;

//Format parmaters as follows ‘param1=paramvalue, param2=paramvalue’

var parameters = ‘param1=’ + parma1value;

//Do not remove:  ‘cors’ is equal to true if a browser can create an XMLHttpRequest object and if that XMLHttpRequest object has a withCredentials property.To enable cross-domain requests in environments that do not support cors yet but do allow cross-domain XHR requests

  jQuery.support.cors =true;
//Make an ajax request
$.ajax({
type:“POST”,
url: webServiceURL,
data: parameters,
dataType:“xml”,
crossDomain:true,
success: OnSuccess,//method upon success
error: OnError//method upon error/failure
 });

//ajax

//1. GET the node value from webservice xml response – $(data).find(“nodeName1”).text()

//2. Find() function will get all the nodes with the provided name. If you have child nodes with the same name. All of the values are returned as a concatinated string

//Perform success operations

function OnSuccess(data, status) {

                document.getElementById(‘<%= Ctrl2.ClientID %>’).value = $(data).find(“nodeName1”).text();

                document.getElementById(‘<%= Ctrl3.ClientID %>’).value = $(data).find(“nodeName2”).text();

                document.getElementById(‘<%= Ctrl4.ClientID %>’).value = $(data).find(“nodeName3”).text();

            }

//Perform error operations

function OnError(request, status, error) {

                alert(‘Error calling webservice. Please enter meta data manually!’);

            }

}

</script>

</head>

<body>

<table>

<tr>

<td>

<!– TextBox which takes user input as a parameter to the webservice –>

<asp:textboxid=”Ctrl1″ runat=”server”/>

</td>

<td>

<!– TextBox which displays value from the webservice –>

    <asp:textboxid=”Ctr2″ runat=”server”/>

</td>

</tr>

<tr>

<td>

<!– TextBox which displays value from the webservice –>

<asp:textboxid=”Ctrl3″runat=”server” />

</td>

<td>

<!– TextBox which displays value from the webservice –>

<asp:textboxid=”Ctrl4″runat=”server”/>

</td>

</tr>

<tr>

<td>

<!– Activity Indicator container: Hidden by default –>

<div id=”activityIndicator”style=”display: none;”>

<img id=”imgActivityIndicator”src=”Images/ajax-loader.gif” alt=”Loading”/>

</div>

      </td>

<td>

<!– CallWebService() function called ‘onclick’ of a button –>

<input type=”button”name=”BtnFetchData” title=”Fetch Data” value=”Fetch

Data” onclick=”CallWebSerivce();” />

</td>

</tr>

</table>

</body>

</html>

Useful links:

1. You may generate ajax loader icons from Ajax Load Info

2. JQuery script files: www.jquery.com

1

Deploy InfoPath 2010 with manage code as ‘Content Type’ via a ‘Feature’ in SharePoint 2010

1. Creating InfoPath:
I have created the following InfoPath for demonstration purpose, please ignore the content. Before we go further  I believe you have your InfoPath form ready for deployment.

InfoPath form

InfoPath form

2. Publish InfoPath: Please follow the below steps to publish the InfoPath form

Step 1: Change the Security Level to “Full Trust”.

Note: This is required because the private assembly for a managed code form template is running under a hosted CLR application domain, the security settings for forms require full trust.

Step 2: Click on the ‘Info’ and you should find ‘Publish your form’


Step 3: Locate the path where you want to publish and name the template appropriately

Step 4: If you are not sure you may leave this field empty

Step 5:  Publish the form.

3. Create Visual  Studio Project:

Step 1 : Create an empty SharePoint project

Step 2:  Add a feature and name it appropriately. Please make sure you have ‘Site’ as the scope of the feature as this InfoPath is deployed as content type

Step 3:  Add a new Element File
Note: Empty elements are most often used to define SharePoint project items that lack a project or project item template in Visual Studio, such as fields. When you add an empty element to your project, it contains a single file that is named Elements.xml. Use XML statements to define the desired elements in Elements.xml

Creating Empty Element

Step 4: Add the dll and the InfoPath to the element folder as shown below

Step 5: Configure element properties as shown below.
Note: Use the XsnFeatureReceiver class to trap events that are raised after an InfoPath form template installation, uninstallation, activation, or deactivation on the server. The assembly and class name used to trap these events must be referenced in the feature.xml file used to deploy the SharePoint feature containing one or more InfoPath form templates.

Feature.xml file would look as below
<?xml version="1.0" encoding="us-ascii" standalone="yes"?>
<Feature Id="39EBA28E-2238-4C82-A37E-81BAEBFB7A61" 
    Title="Simple Form Template" 
    Description="This feature deploys infopath as content type" 
    Version="1.0.0.0" 
    Scope="Site" 
    ReceiverClass="Microsoft.Office.InfoPath.Server.Administration.XsnFeatureReceiver" 
    ReceiverAssembly="Microsoft.Office.InfoPath.Server, Version=14.0.0.0, Culture=neutral, PublicKeyToken=71e9bce111e9429c" 
    xmlns="http://schemas.microsoft.com/sharepoint/">
    <ElementManifests>
        <ElementManifest Location="Elements.xml" />
        <ElementFile Location="InfoPathasFeature.xsn" />
    </ElementManifests>
    <ActivationDependencies>
        <ActivationDependency FeatureId="C88C4FF1-DBF5-4649-AD9F-C6C426EBCBF5" />
    </ActivationDependencies>
</Feature>

Step 6: Include the .xsn, dll to be a part of deployment files.
If you preview your feature you would see the following the are no items in the feature except for the ‘Element.xml’. See how it changes after completing this step

Modify the xsn properties, change the ‘Deployment Type’ to ‘Element File’

Modify the dll properties, change the ‘Deployment  Type’ to ‘ElementFile’

Note: Setting the ‘DeploymentType’ to ‘ElementFile’ specifies the deployment of element files to SharePoint. Element files are referenced by the feature manifest (feature.xml). The default path for ElementFile is {SharePointRoot}TemplateFeatures.

After completing the above modifications, you will find the items in the feature as show below.

Step 7: Package and Deploy the project

Step 8: After you are done with deployment, verify if the folder structure is shown as below

Modify List Settings:

Follow the below steps to set the default content types to the form library.

Navigate to the advanced setting of the ‘Form Templates’ library and select ‘Yes’ as shown below.

Navigate to the ‘Add  Content Types’ Screen & if you select “All Groups” or preferable “Microsoft InfoPath” you should find the “InfoPathasFeature” Content Type in the list.

Check if the content type is added:

Your are done! Check if the InfoPath is showing up if you select ‘New Document’ as below

References:

1. How to: Deploy InfoPath Form Templates with Code
2. Security levels of InfoPath forms
3. XSNFeatureReciever Class