This blog post Part 2/4 is all about what Managed Metadata is for SharePoint, why is it so important to maintain accurate and consisted metadata across portals and how SharePoint can help manage metadata.
Part 1: Introduction
Part 2: Creating your first Managed Metadata Service Application
Part 3: Creating Term set, Terms and Tagging content with managed terms.
Part 4: Leveraging Termset to create and update Site Navigation
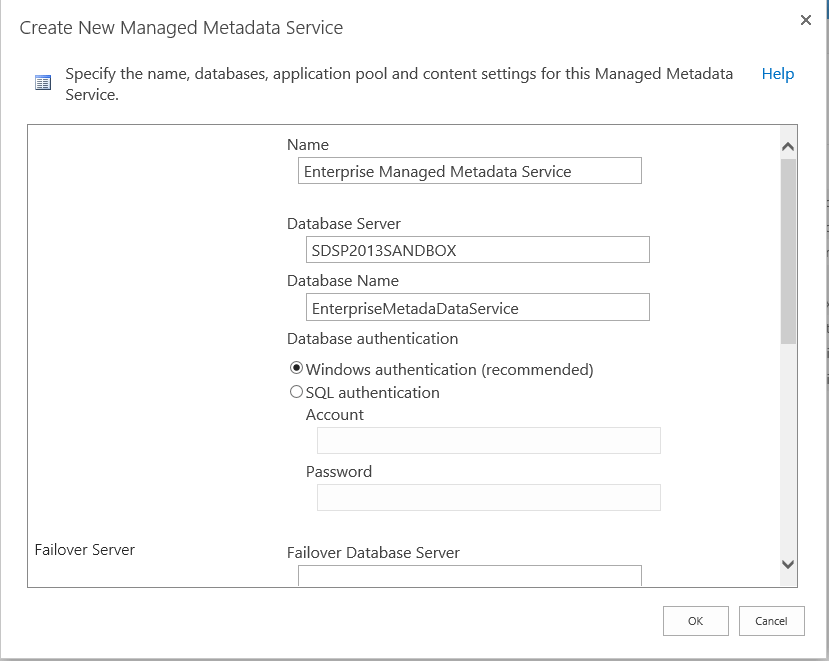
Step 1: Create new Managed Metadata Service using ‘New’ under ‘Service Applications’ section with in the ribbon.

Add new Managed Metadata Service
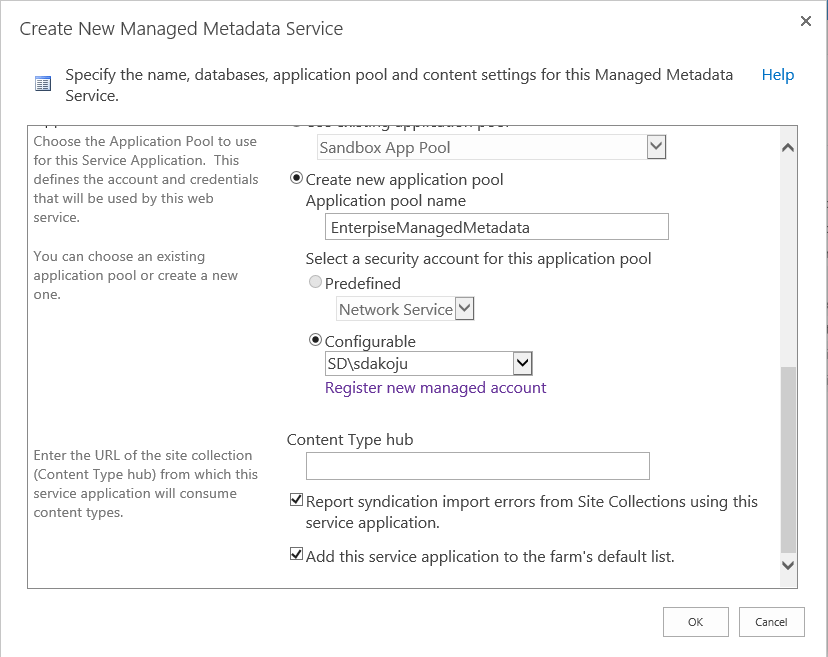
Step 2: Give appropriate name to your service application, database name and you may create or use an existing application pool.
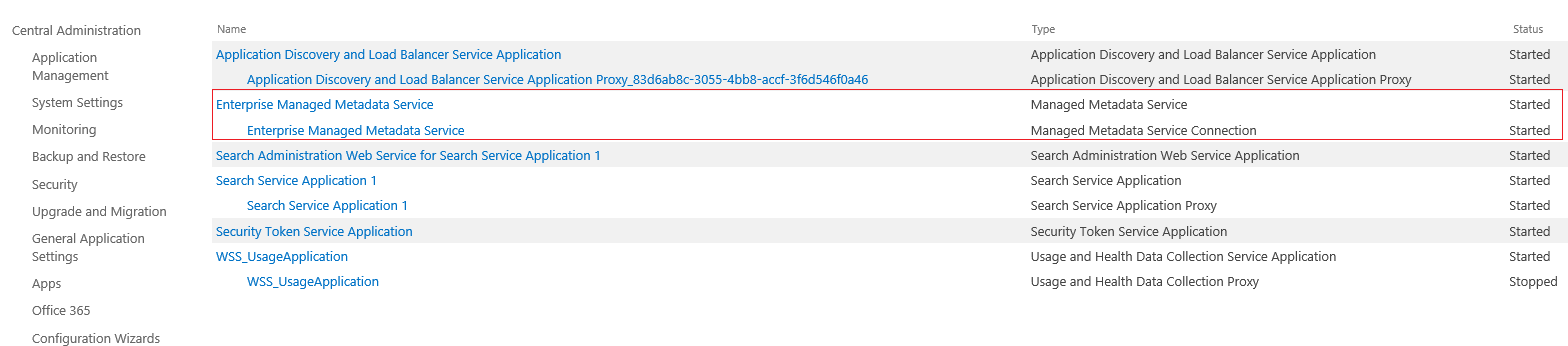
Step 3: Confirm if the Service Application is created. Please see highlighted below.

Step 4: Make sure Managed Metadata Web Service is started under Central Administration > System Settings > Manage services on server
You may have encountered the following error. Please see the resolution following the screen capture.

Make sure your ‘Managed Metadata Web Service’ is started.

Step 5: Reset IIS. Highly recommended.
You are all set! Congratulate yourself, you created your first Managed Metadata Service.
Things to observe:
1. You should see at a database created with the name you gave to the Database in step 2.

2. Also there Should be an entry in the IIS, click explore and you should see a folder with .svc file.

Please continue to read other related blog posts for more understanding of Managed Metadata services with SharePoint.